Fireborn's 2nd Tournament: Resolved at Last
Moderators: th15, Moderators
-
Captain Trek
- Commodore

- Posts: 534
- Joined: Thu Jun 21, 2007 12:39 pm
-
Himura.Kenshin
- Rear Admiral

- Posts: 887
- Joined: Fri Sep 28, 2007 11:35 pm
- Location: Below My Postcount
Because you have to do the same thing to Bullette?  .
.
Go ahead. I'll probably lose, but hey.
... Unless I can actually kill TBAT regularly, seeing as there are more layers of weapons and sections to go through to get to the deflectors...
Go ahead. I'll probably lose, but hey.
... Unless I can actually kill TBAT regularly, seeing as there are more layers of weapons and sections to go through to get to the deflectors...
Warcraft III (U.S. East) -~-~- [( Aequinox / DACI-Equinox / Equinox]4[Lyfe )]
XBox 360 LIVE (Mostly CoD:WaW) -~-~- [( EquinoxXenom )]
[quote="Wyrdysm Games"][i]Stop quoting the line above in your sigs![/i][/quote]
XBox 360 LIVE (Mostly CoD:WaW) -~-~- [( EquinoxXenom )]
[quote="Wyrdysm Games"][i]Stop quoting the line above in your sigs![/i][/quote]

It's a better solution then anything I could think of. You're gonna have to do it again with the Swarm Station though.
If th15 decides to fix it so that enemy AI will target their Demeters like allied AI do, then the Obfustication would automatically lose and the two demeter pod ships will go unrivaled.
If th15 decides to fix it so that enemy AI will target their Demeters like allied AI do, then the Obfustication would automatically lose and the two demeter pod ships will go unrivaled.
-
Captain Trek
- Commodore
- Posts: 534
- Joined: Thu Jun 21, 2007 12:39 pm
Yes, and on the other hand, if TH went the other way and made it so allied demeters target like enemy ones, the Drone ships would lose to the Obfustication (and possibly the Bullete) no problem...If th15 decides to fix it so that enemy AI will target their Demeters like allied AI do, then the Obfustication would automatically lose and the two demeter pod ships will go unrivaled.
By the way, I've decided to take a break from the fights for today. It's 8:30 PM here now and I still haven't done them. First I went to a mini-golf course with my family and them I spent the last two-and-a-half hours trying to get Star Trek Armada II: Fleet Operations to work on my Vista machine (it still doesn't).
Don't worry, though, I'll still run the fights I said I was going to run... it's just that their date has now been pushed back to the eigth...
[img]http://i210.photobucket.com/albums/bb6/CaptainTrek/Federationsignature.jpg[/img]
-
Captain Trek
- Commodore
- Posts: 534
- Joined: Thu Jun 21, 2007 12:39 pm
Battle Results for January 10th:'
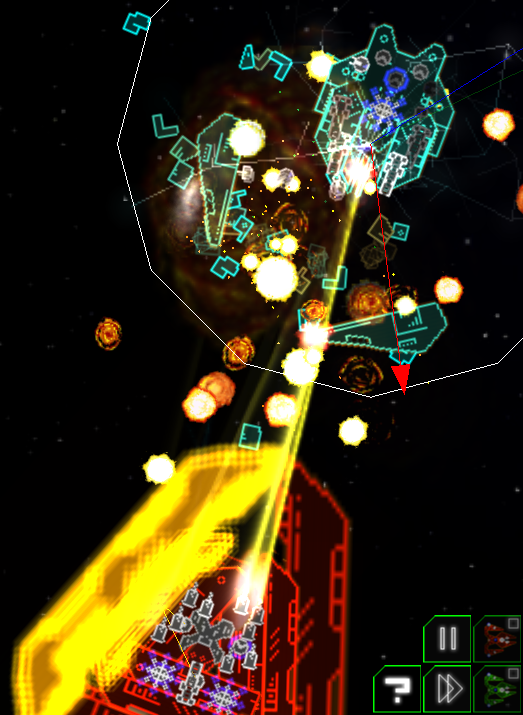
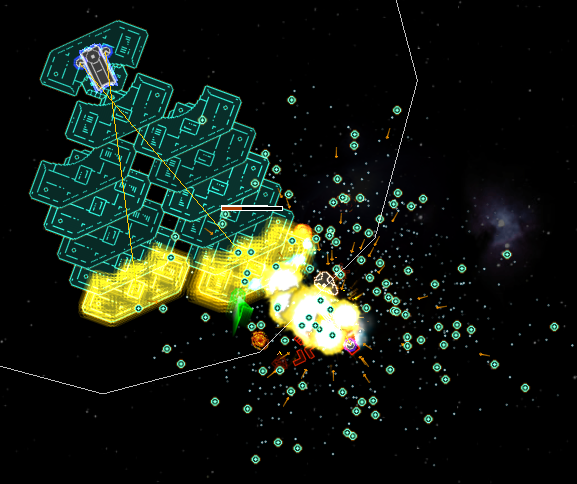
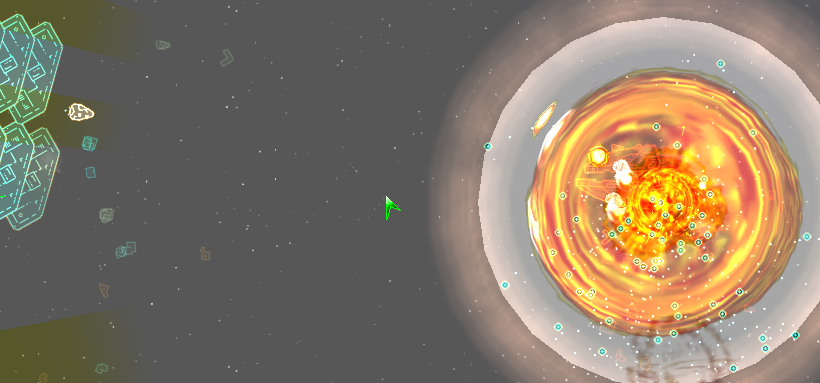
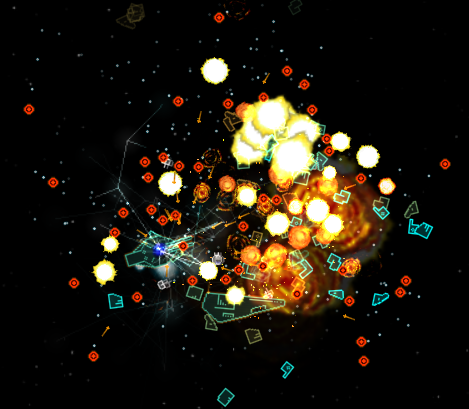
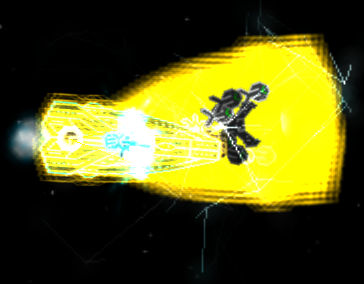
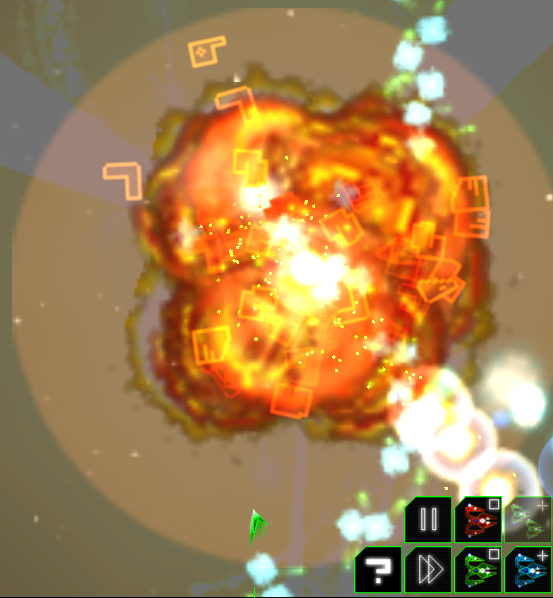
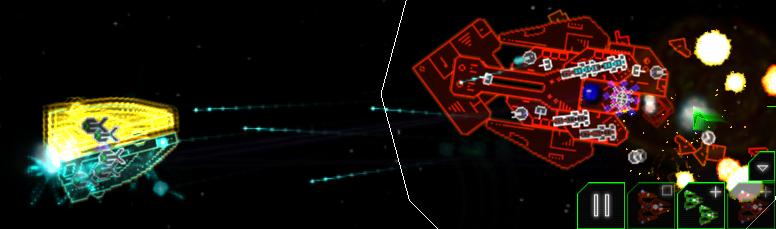
Big Armoured Turd vs Swarm Station:
Round 1:
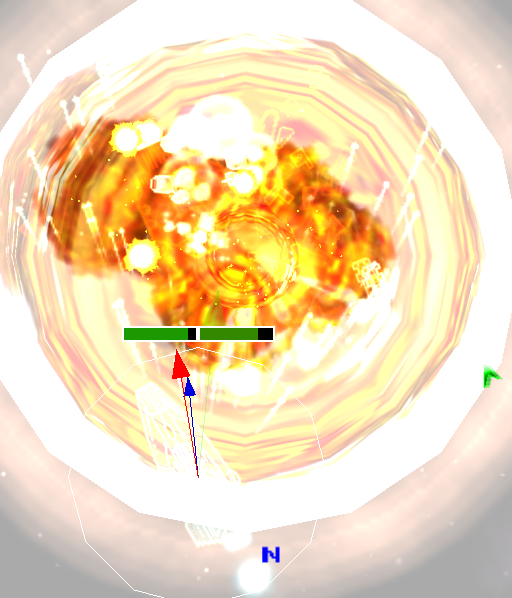
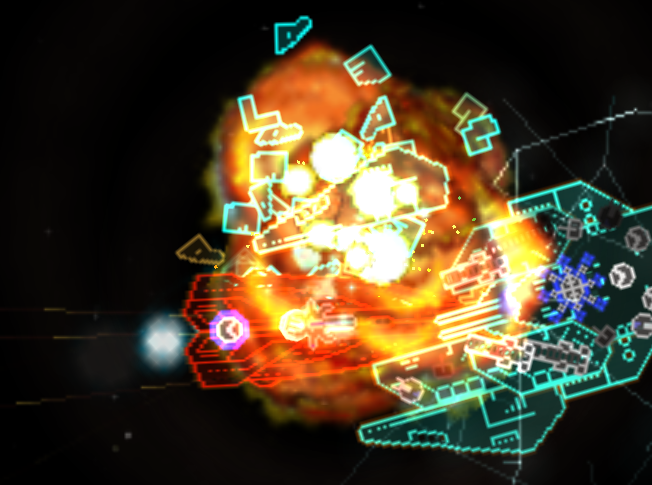
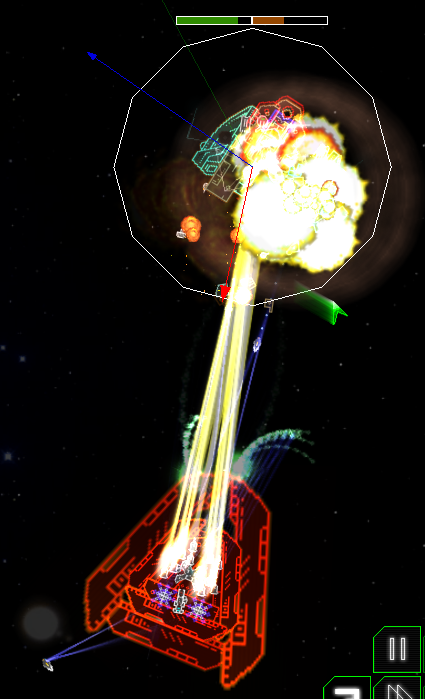
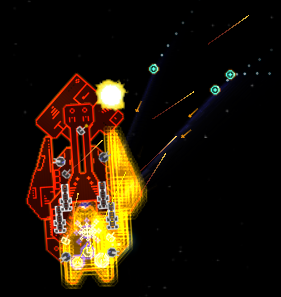
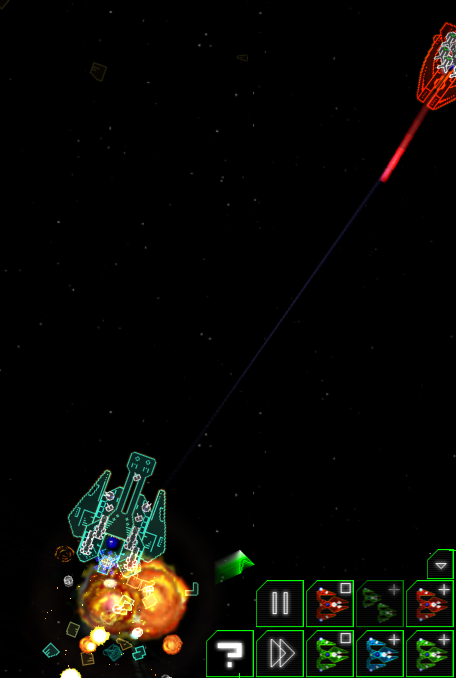
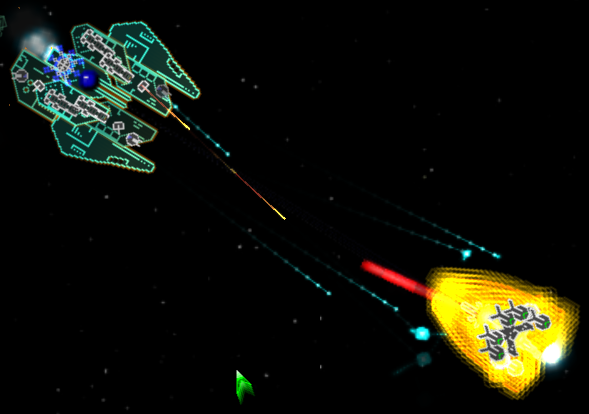
The fight whizzed by so fast I could barely take the pictures. Both ships were quick to surround each other with drones...
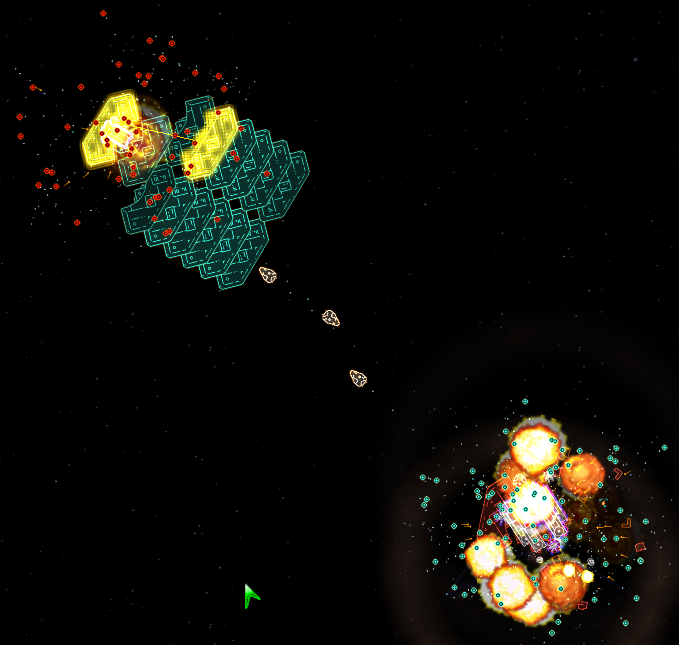
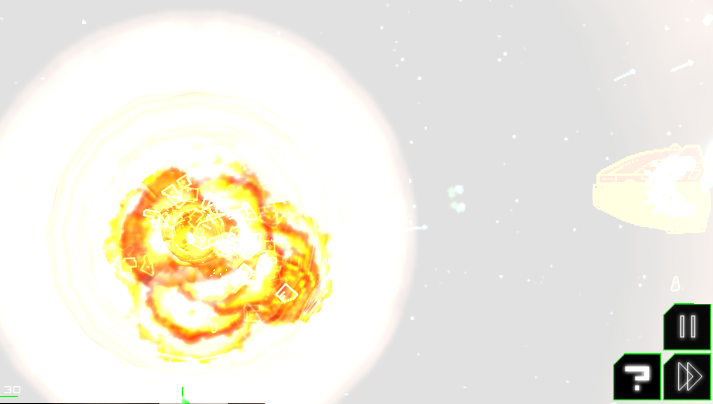
...And strangely enough, both ships blew each other up... The Big Armoured Turd lost a critical section, went into hull shock and exploded, then the Swarm Station followed suit a second later, the Turd's revenge... Technically, though, this fight goes to the Swarm Station, because the Big Armoured Turd blew up first...
Round 2:
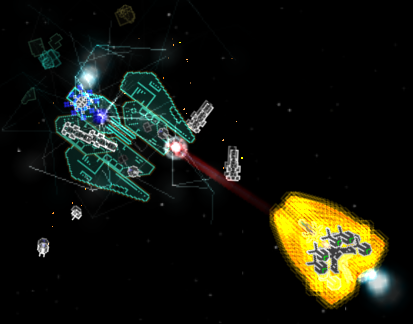
Once again, both ships were quick to surround each other...
And both ships were destroyed. However, once again, the Big Armoured Turd was the first to go up, a technical victory for the Swarm Station...
Winner by default: Swarm Station
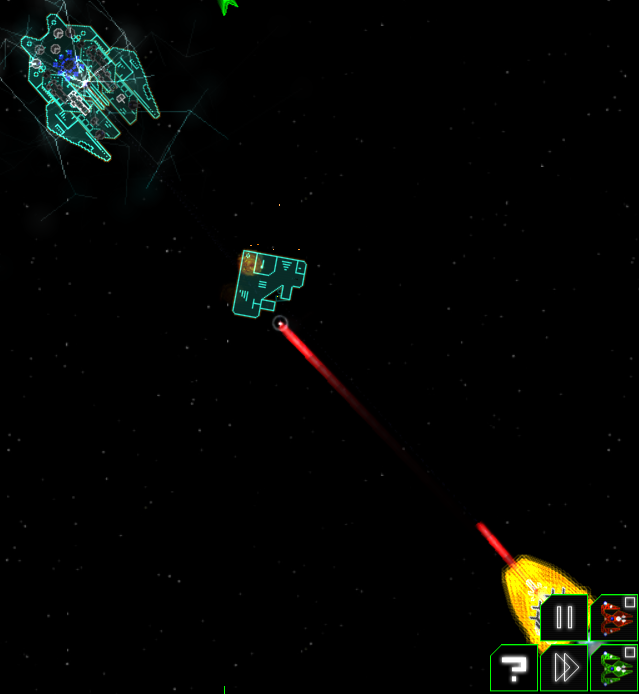
Carbon vs Phoebus:
Round 1:
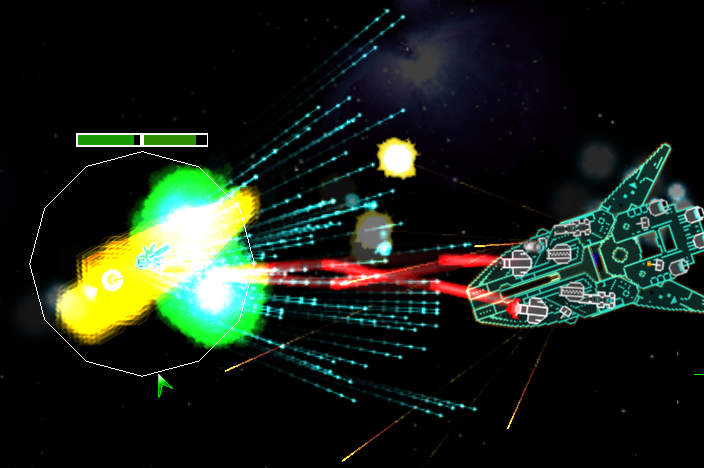
Rather, predictably, both ships raised their deflectors and fired volley after useless, deflector hitting volley at each other. At one stage, the Phoebus cornered the Carbon and almost destroyed the strut carrying the ship's primary deflector bunker. In the end, though, it was the bunker itself that was the first section on either side to be destroyed, as deflector failure set in...
Whilst the Carbon did manage to blow off a few of the Phoebus' mining beams by sniping through the ship's hull with its railguns, it wasn't enough to save the Carbon from the onslaught wrought by the remaining beams. The Carbon was soon sent into hull shock...
...and was destroyed, simply not having enough railguns to lance through the Phoebus' armour....
Round 2:
Basically the same thing sort of thing happened as in the last round...
Except that the Phoebus took a lot more damage. That didn't, however, save the Carbon from hull shock...
...and, shortly after, destruction...
Winner: Phoebus
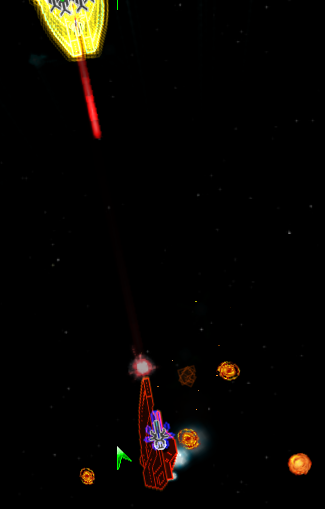
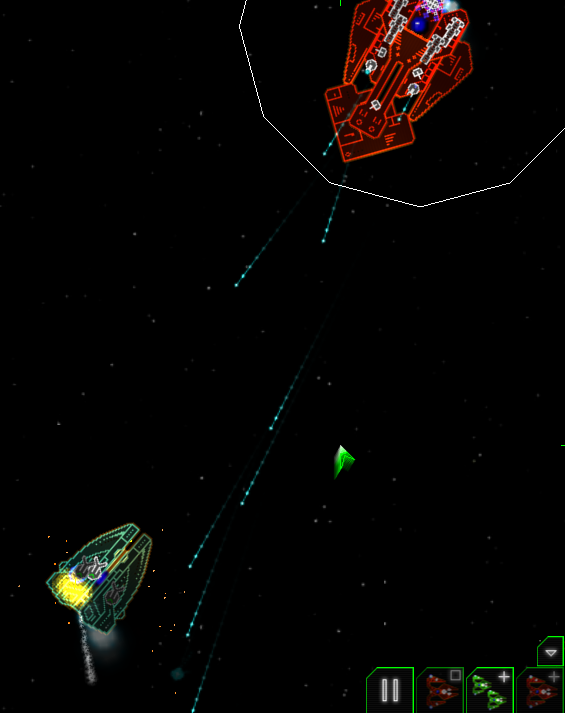
Bullete vs Scorpion:
Round 1:
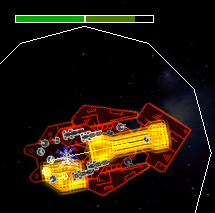
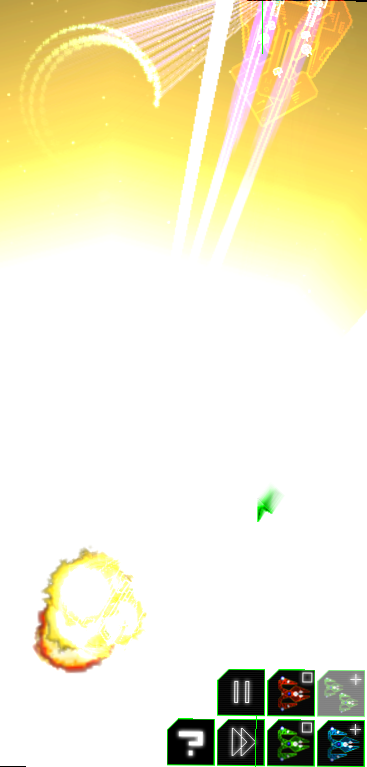
At first it looked like the Scorpion might pull a major coup, with its plasma charges able to pierce through the Bullete's deflector screen and hit its weapons directly...
However, its reinforced outer hull couldn't hold up long enough, and with a well timed Frosch gun discharge, the Bullete took the lead...
And without its plasma charges, the Scorpion was no match for its opponent...
Round 2:
Once again, the Scorpion was quick to lay down the plasma charge barrage. This time, the Bullete's first Forsch gun discharge missed, unlike during the first round. However, as the Bullete, the explosion radius on the Scorpion's plasma charges was simply too small to hit the Bullete's weapons...
And almost in an exact replay of the last round, the Bullete's second Frosch gun discharge hit home, just as the Scorpion was losing its plasma charges...
Shortly after, the Scorpion once again lost the fight...
Winner: Bullete
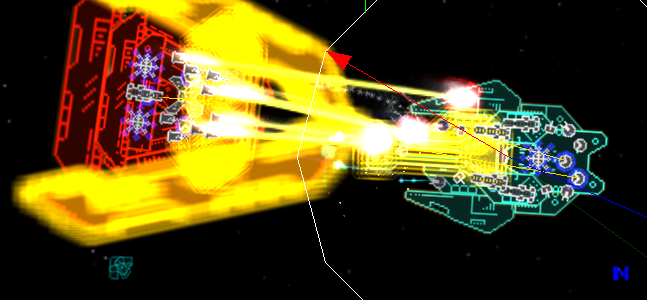
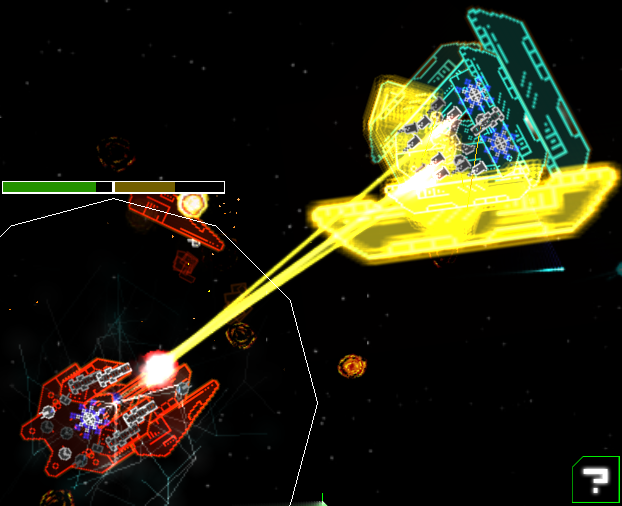
The Big Armoured Turd vs Bullete:
Round 1:
After what happened with the Big Armoured Turd vs Obfuscation III, I was not looking forward to this fight. However, incredibly, the Bullete didn't raise its deflectors and was annihilated... I tried again, same thing... For some reason, the Bullete seems to be attaching its deflectors to its tiny sections... regardless of the reason, though, this makes round 1 a clear (and surprising) victory for the Big Armoured Turd...
Round 2:
Reversing the sides made no difference. The Bullete always seems to target the wrong sections with its deflectors when fighting the Big Armoured Turd. Ridiculous, and costly...
Winner: The Big Armoured Turd
Cruiser standings after round 3:
Wins-losses:
Bullete: 3-1
Obfuscation III: 2-0
Swarm Station: 3-0
Big Armoured Turd: 2-2
Carbon: 1-2
Phoebus: 1-1
Scorpion: 0-3
SCOTLAND: 0-3
Tomorrow's fights:
Bullete vs Carbon
Phoebus vs SCOTLAND
Big Armoured Turd vs Scorpion
Bullete vs Swarm Station
Big Armoured Turd vs Swarm Station:
Round 1:
The fight whizzed by so fast I could barely take the pictures. Both ships were quick to surround each other with drones...
...And strangely enough, both ships blew each other up... The Big Armoured Turd lost a critical section, went into hull shock and exploded, then the Swarm Station followed suit a second later, the Turd's revenge... Technically, though, this fight goes to the Swarm Station, because the Big Armoured Turd blew up first...
Round 2:
Once again, both ships were quick to surround each other...
And both ships were destroyed. However, once again, the Big Armoured Turd was the first to go up, a technical victory for the Swarm Station...
Winner by default: Swarm Station
Carbon vs Phoebus:
Round 1:
Rather, predictably, both ships raised their deflectors and fired volley after useless, deflector hitting volley at each other. At one stage, the Phoebus cornered the Carbon and almost destroyed the strut carrying the ship's primary deflector bunker. In the end, though, it was the bunker itself that was the first section on either side to be destroyed, as deflector failure set in...
Whilst the Carbon did manage to blow off a few of the Phoebus' mining beams by sniping through the ship's hull with its railguns, it wasn't enough to save the Carbon from the onslaught wrought by the remaining beams. The Carbon was soon sent into hull shock...
...and was destroyed, simply not having enough railguns to lance through the Phoebus' armour....
Round 2:
Basically the same thing sort of thing happened as in the last round...
Except that the Phoebus took a lot more damage. That didn't, however, save the Carbon from hull shock...
...and, shortly after, destruction...
Winner: Phoebus
Bullete vs Scorpion:
Round 1:
At first it looked like the Scorpion might pull a major coup, with its plasma charges able to pierce through the Bullete's deflector screen and hit its weapons directly...
However, its reinforced outer hull couldn't hold up long enough, and with a well timed Frosch gun discharge, the Bullete took the lead...
And without its plasma charges, the Scorpion was no match for its opponent...
Round 2:
Once again, the Scorpion was quick to lay down the plasma charge barrage. This time, the Bullete's first Forsch gun discharge missed, unlike during the first round. However, as the Bullete, the explosion radius on the Scorpion's plasma charges was simply too small to hit the Bullete's weapons...
And almost in an exact replay of the last round, the Bullete's second Frosch gun discharge hit home, just as the Scorpion was losing its plasma charges...
Shortly after, the Scorpion once again lost the fight...
Winner: Bullete
The Big Armoured Turd vs Bullete:
Round 1:
After what happened with the Big Armoured Turd vs Obfuscation III, I was not looking forward to this fight. However, incredibly, the Bullete didn't raise its deflectors and was annihilated... I tried again, same thing... For some reason, the Bullete seems to be attaching its deflectors to its tiny sections... regardless of the reason, though, this makes round 1 a clear (and surprising) victory for the Big Armoured Turd...
Round 2:
Reversing the sides made no difference. The Bullete always seems to target the wrong sections with its deflectors when fighting the Big Armoured Turd. Ridiculous, and costly...
Winner: The Big Armoured Turd
Cruiser standings after round 3:
Wins-losses:
Bullete: 3-1
Obfuscation III: 2-0
Swarm Station: 3-0
Big Armoured Turd: 2-2
Carbon: 1-2
Phoebus: 1-1
Scorpion: 0-3
SCOTLAND: 0-3
Tomorrow's fights:
Bullete vs Carbon
Phoebus vs SCOTLAND
Big Armoured Turd vs Scorpion
Bullete vs Swarm Station
[img]http://i210.photobucket.com/albums/bb6/CaptainTrek/Federationsignature.jpg[/img]
-
Captain Trek
- Commodore
- Posts: 534
- Joined: Thu Jun 21, 2007 12:39 pm
Well, sorry it took so long, guys, but here are eight more cruiser fights... 
Battle results for January 18th:
Bullete vs Carbon:
Round 1:
The Bullete was very, very slow in raising its deflectors (I'm not sure if this was because it set its deflectors to its tiny sections immediately upon seeing the Carbon or just because it didn't raise its deflectors at all for whatever reason), and the Carbon quickly took advantage of this, wasting no time in sniping off the Bullete's Frosch gun...
By the time the Bullete raised both of its deflectors, it was well on the way to losing some of its pulse guns and it looked like the Carbon might just cause a major upset. However, the Bullete fought back, claiming the first section kill...
...and held on, even as its sections nearly collapsed under the Carbon's furious railgun barrages. Eventually, the Bullete was able to send the Carbon into a hull shock,...
...one that proved fatal...
Round 2:
The Bullete was somewhat better with its deflectors this time, managing to preserve its Frosch gun long enough for it to get a shot off...
...which drained the Carbon's deflectors. When the two ships got close, the Bullete was hit by the Carbon's pulse guns, which is what caused it to correctly apply its deflectors (as had happened last round). With a second Frosch gun ship, the Carbon's deflectors failed and the Bullete was quick to take advantage, tearing through the Carbon's armour, sending it into hull shock...
...and destroying it...

Winner: Bullete
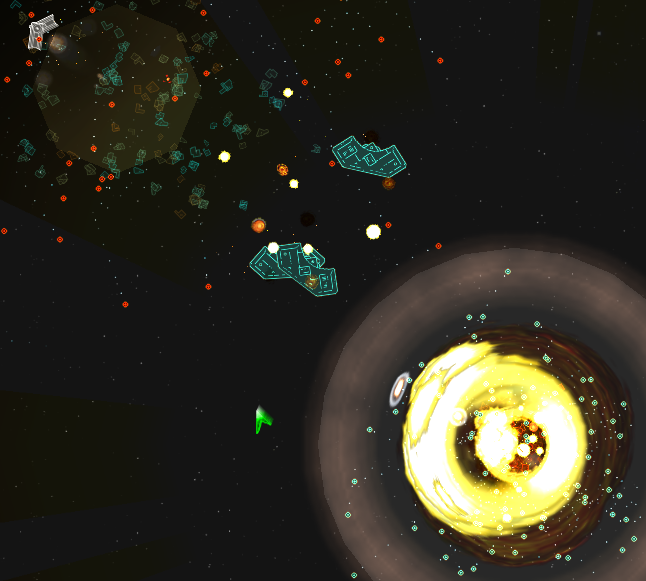
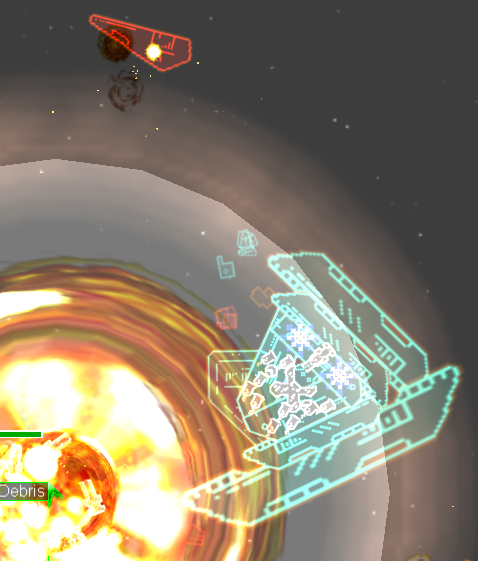
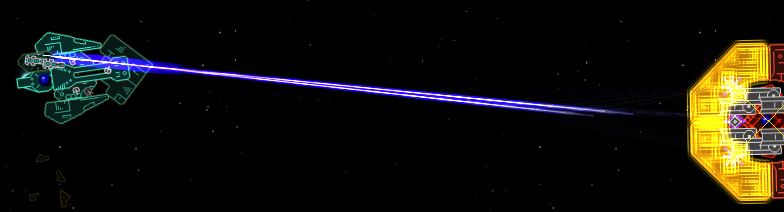
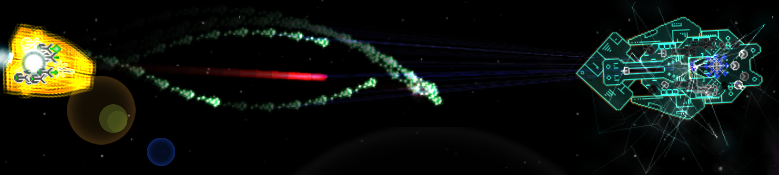
Phoebus vs SCOTLAND:
Round 1:
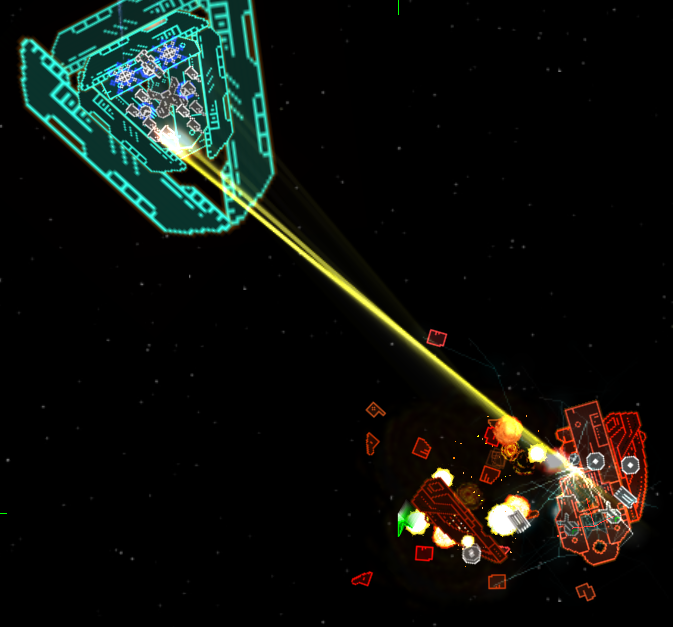
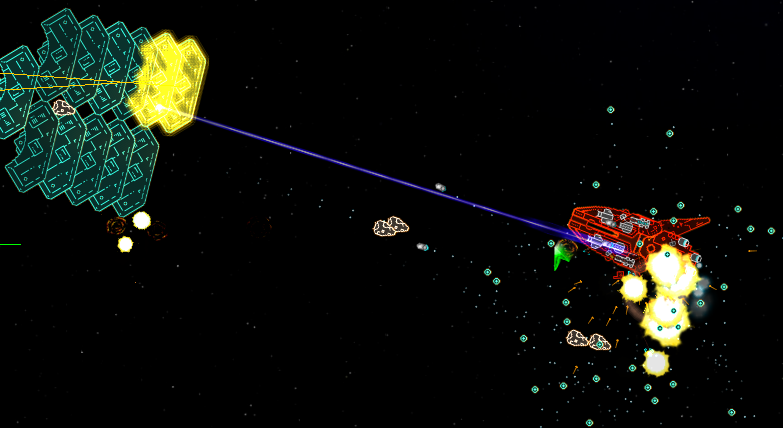
The Phoebus took the early lead. Taking advantage of a poor deflector placement, it quickly blew off the SCOTLAND's bunker section...
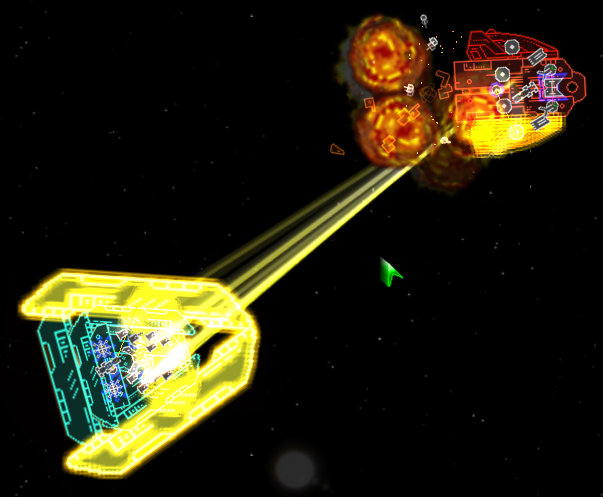
The SCOTLAND's deflector did still manage to keep it alive for some time, however, as the Phoebus' super accurate mining beams would always target the SCOTLAND's core, hitting the same section every time. The SCOTLAND is faster than the Phoebus and was quickly able to pull out of the Phoebus' mining beam range each time it jumped in close with its Dieterling device. The Scotland didn't proved nimble enough, however, and its own weapons proved useless against the Phoebus' deflector and impeder combination. The Phoebus was able to lance off the section it had been hitting when the SCOTLAND's deflector failed, sending the SCOTLAND into hull shock...
It wasn't much longer before the Phoebus Dieterlinged in again again and finished off the SCOTLAND's now exposed core...
Round 2:
This time, the SCOTLAND was able to place its deflector on the right section and was almost able to put up a serious fight. The Phoebus was unable to exploit the SCOTLAND's first deflector failure and looked like it might start losing its exterior armour. That was until a truly brilliant volley from the Phoebus cut straight through the SCOTLAND's then heavily damaged forward bunker section and into the railgun damaged section behind it, destroying that section and its child section as well, which, of course, sent the SCOTLAND into hull shock...
...and didn't take much longer to finish the SCOTLAND off for the section time running...
Winner: Phoebus
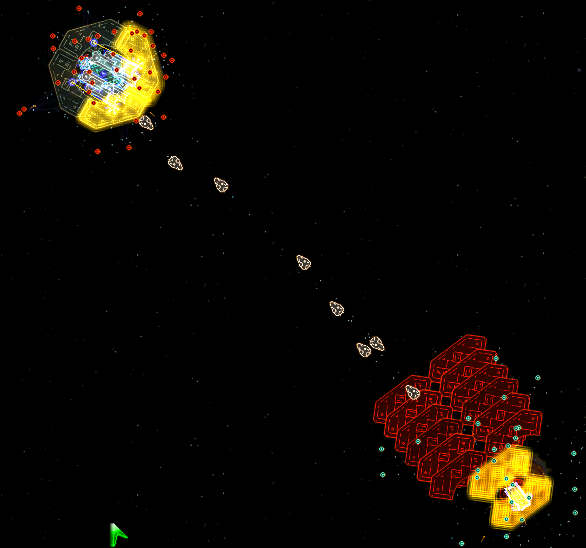
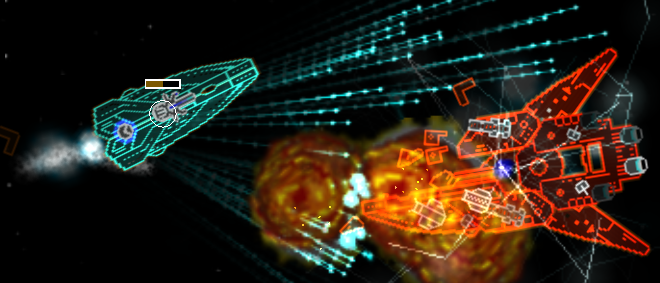
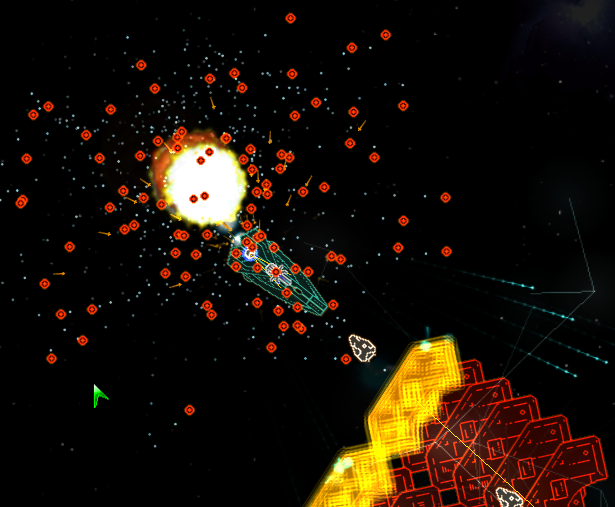
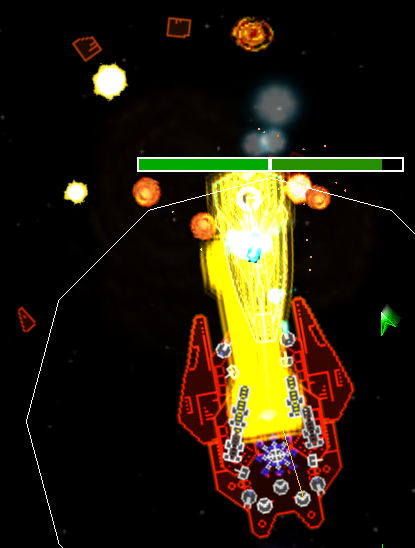
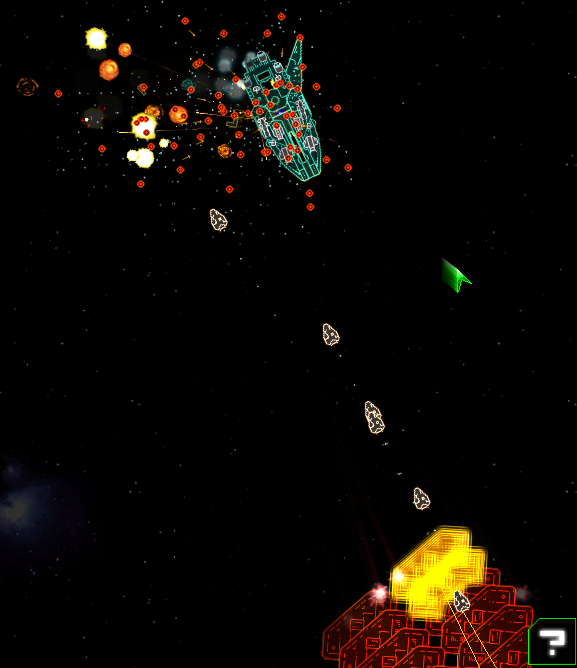
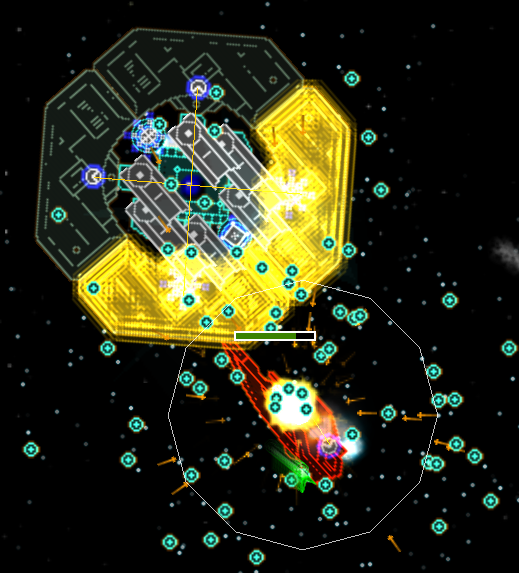
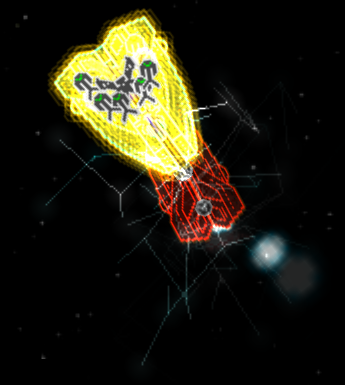
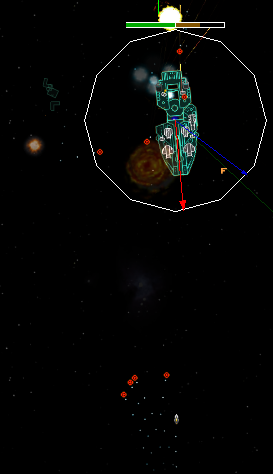
Big Armoured Turd vs Scorpion:
Round 1:
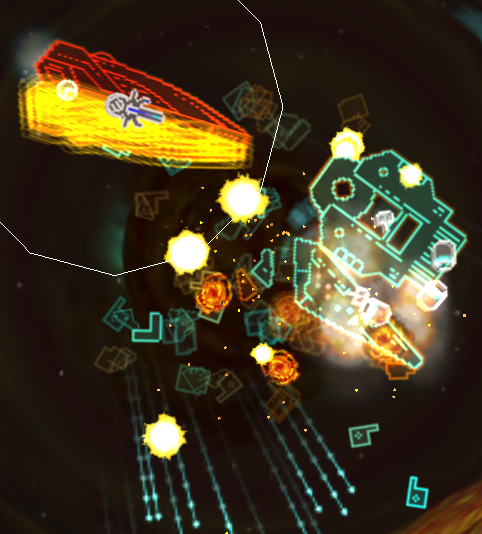
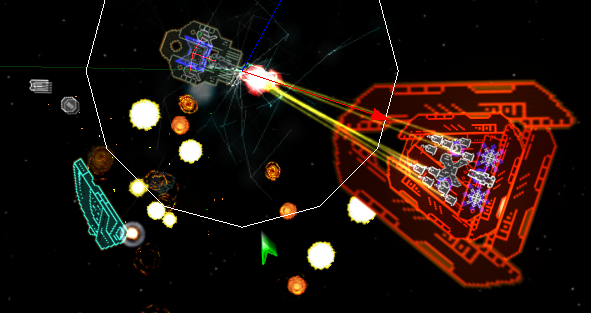
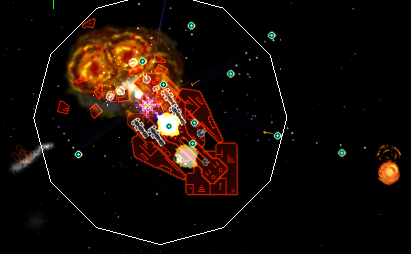
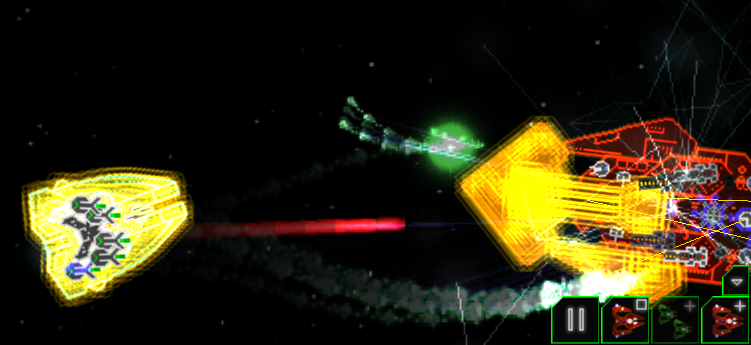
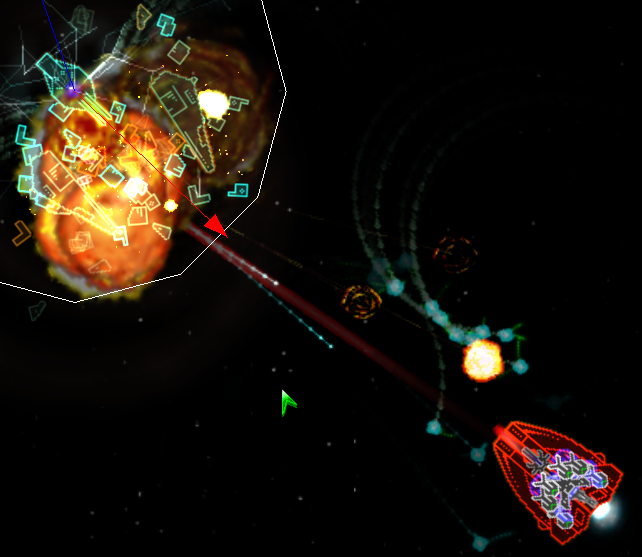
Did the Scorpion stand a chance? I didn't think so... It was quickly surrounded and started taking a heavy pounding...
But it survived the first wave, and thanks to poor deflector placement on the part of T.B.A.T. was actually able to cause some damage...
It was insufficient to save it from T.B.A.T.'s second wave, however...
Round 2:
Poor deflector placement on the part of T.B.A.T. didn't stop the Scorpion from being surrounded...
...and this time, the Scorpion was unable to survive the first wave...
Winner: The Big Armoured Turd
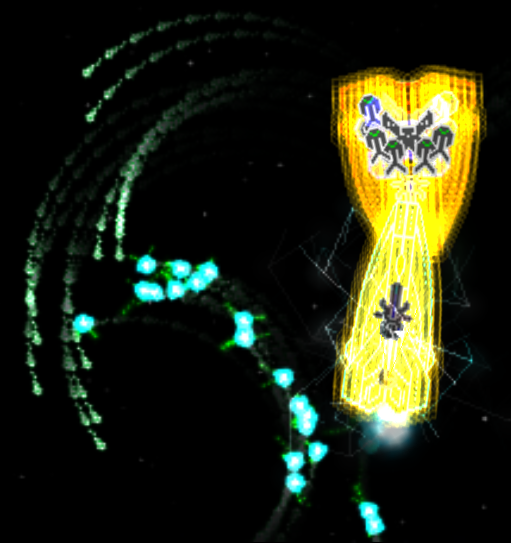
Bullete vs Swarm Station:
Rounds 1:
Just like its fight against the Big Armoured Turd, the Bullete assigned its deflectors to the wrong sections and was taken apart by the relentless swarm of drones, the Bullete's own fire uselessly impacting the Swarm Station's deflector shields...
Round 2:
Interestingly, the Bullete did actually manage to raise one of its deflectors onto to the correct section this time... however, just one proved not to be enough as the other side of the ship was taken apart, just as the Bullete was about the get inside the Swarm Station with its pulse guns...
Winner: Swarm Station
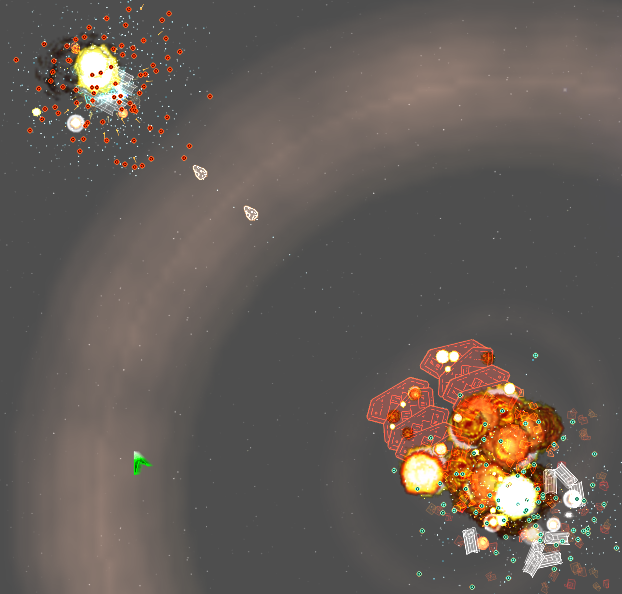
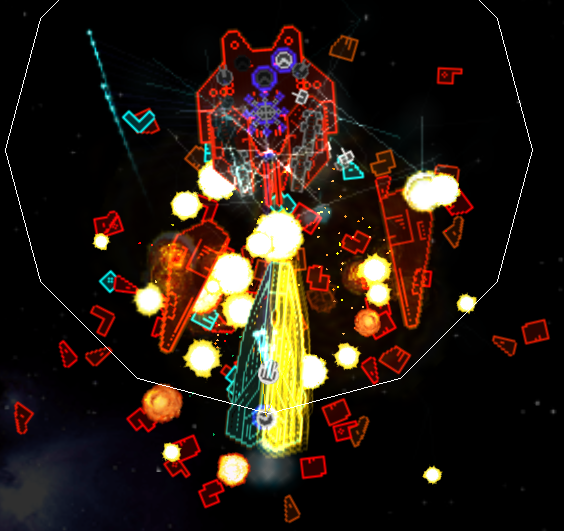
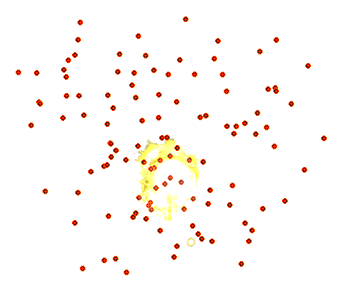
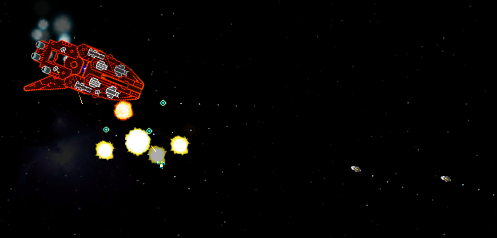
Carbon vs Swarm Station:
Round 1:
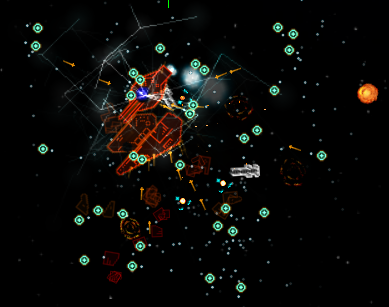
The result of this fight was entirely predictable, but the Carbon did do better against the Swarm Station than it had against the Big Armoured Turd. The Carbon got some fairly good deflector placing and its flak guns and impeder were holding the initial sets of drones back somewhat...
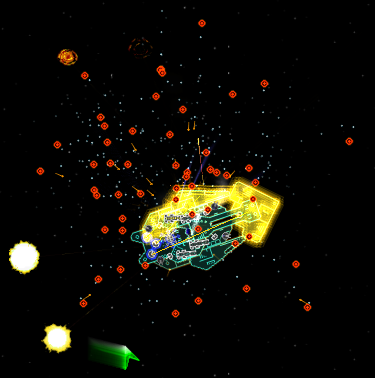
Ultimately, though, the Carbon was overwhelmed and lost its deflectors...
Rendering it powerless to survive the second wave, the Swarm Station's deflectors easily repulsing the few railgun shots the Carbon managed to put out...
Round 2:
The Carbon had some great deflector placement and lucky flak gun shots, surviving the Swarm Station's first wave virtually unscathed...
It survived the Station's second wave as well...
But by the third wave, the Carbon was wearing down and lost its deflectors...
To be finished off with the Swarm Station's final wave... Throughout the entire fight the Carbon's railguns were unable to pierce the Swarm Station's deflectors. Even when these failed, the Carbon simply didn't have enough weapons to capitalize on the momentary weakness...
Winner: Swarm Station
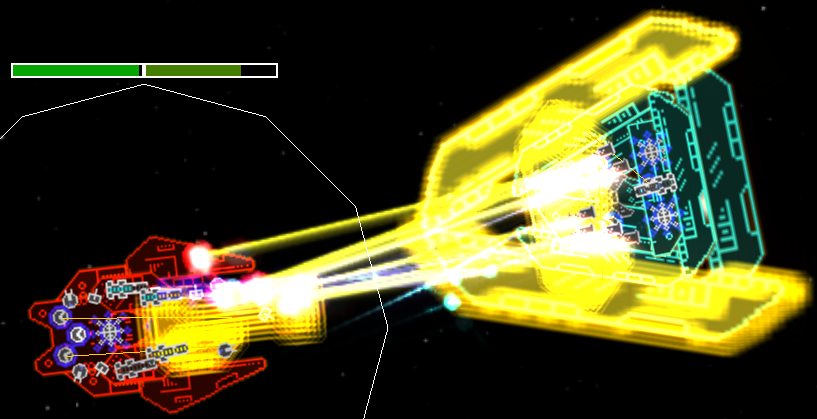
Bullete vs Obfuscation III:
Round 1:
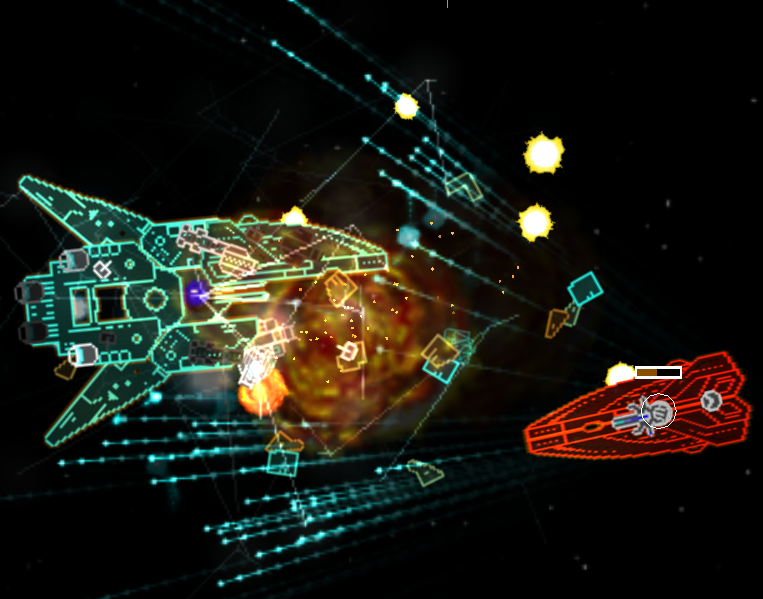
These two ships virtually only differ in their weapons compliment and the fact that the Obfuscation has a Dieterling device. The Bullete proved hard for the Obfuscation to hit with its weasel guns, and the Bullete took an early lead, firing its Frosch gun first. This proved extremely effective against a small target like the Obfuscation and its deflectors quickly failed...
The Obfuscation recovered, however, its strong hull able to withstand the Bulette's assault, if not by much. It was even able to return the Bullete's Frosch gun favor...
The fight continued and in the end it was the Obfuscation that claimed the first section kill, able to use its Dieterling device to leap away from the danger of the Bullete's pulse guns momentarily several times, giving it enough time to score some critical weasel gun hits. The stubborn Bullete, however, Frosch gunned the Obfuscation exactly at that moment and closed back in for one last, desperate assault...
It almost worked. Even when its core was completely exposed, the Bullete continued to fight, refusing to give up, but eventually succumbing to the Obfuscation's quad blaster, which lanced the Bullete's pulse guns off one-by-one...

Round 2:
This time, the Obfuscation fired its Frosch gun first. The Bullete failed to raise its deflectors (or else, attached them to the wrong sections again), and almost lost its starboard section by the time it did manage to raise them....
Soon after, the Bullete did lose its starboard section...
It returned fire with its Frosch gun and did manage to cause minor amounts of damage to the Obfuscation, but it was too late. The Bullete's core was quickly exposed and destroyed by the Obfuscation III...
Winner: Obfuscation III
Carbon vs Obfuscation III:
Round 1:
This fight took awhile. The Carbon's flak guns, deflectors and impeder proved a serious hindrance for the Obfuscation III's weasel guns. A Frosch gunning of the Carbon allowed the Obfuscation to get a few good hits in...
But it was short lived. A second Frosch gunning allowed the Obfuscation to destroy the Carbon's nose piece...
But for a while that was it. Meanwhile, the Carbon's railguns, whilst being mostly repulsed by the Obfuscation's deflectors, had managed to cause some damage to the Obfuscation's weasel guns an almost sniped off a deflector. It wasn't enough, however, and eventually the Carbon lost its vital rear section mounting the ship's deflectors...
A short time later, the rest of the ship followed suit...
Round 2:
The fight started much as the last round had, with the Carbon's deflectors quickly discharging thanks to the Obfuscation's weasel guns. Once again, this didn't prove fatal...
Unlike last round, however, the Obfuscation cornered the Carbon...
...and a close ranged brawl ensued. The Carbon's flak guns once again prevented the Obfuscation from using its weasel guns to full effect. Soon, the Obfuscation started to suffer from deflector failure, its systems being sniped off one-by-one by the Carbon's railguns...
The Obfuscation did manage to return the favor, destroying the Carbon's critical rear section. At this point, the Carbon broke out of the corner and withdrew up the right edge of the map. A greatly worn down Obfuscation followed, but its remaining weasel guns proved useless against the withdrawing Carbon and its flak guns, even despite the ship's loss of its deflectors...
The Carbon then finished detoothing the Obfuscation and cored it...
Round 3: Tiebreaker:
The virtual coin toss came up heads, so the Carbon would play as the ally ship and the Obfuscation III would play as the enemy ship...
The Obfuscation had a lucky break early on, taking out the Carbon's bunker strut...
The Carbon retreated into a corner, and another close range brawl ensued. This one didn't last nearly as long as round 2's however. The Carbon soon lost its critical rear section, not having had enough time to snipe off any of the Obfuscation's systems...
It wasn't much longer before the Carbon went into hull shock...
...and was cut to pieces...
Winner: Obfuscation III
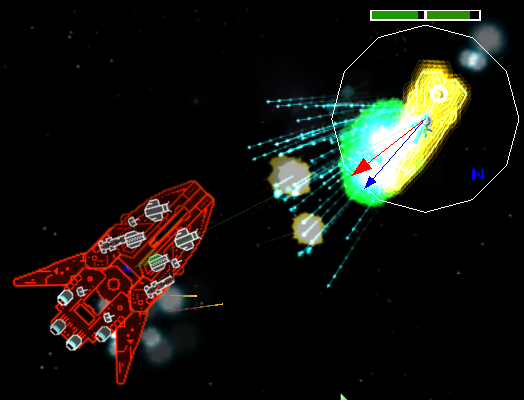
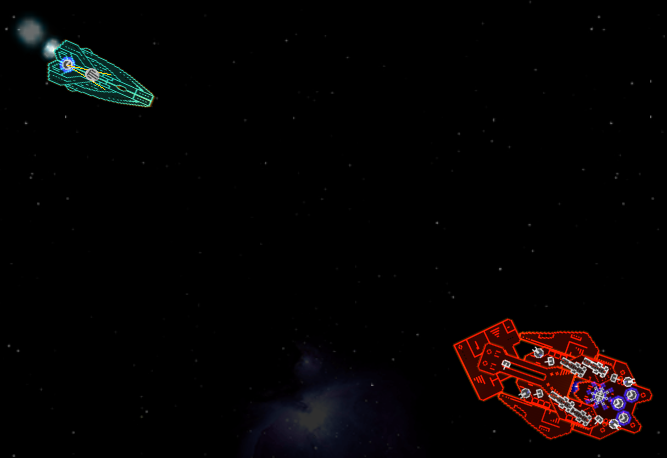
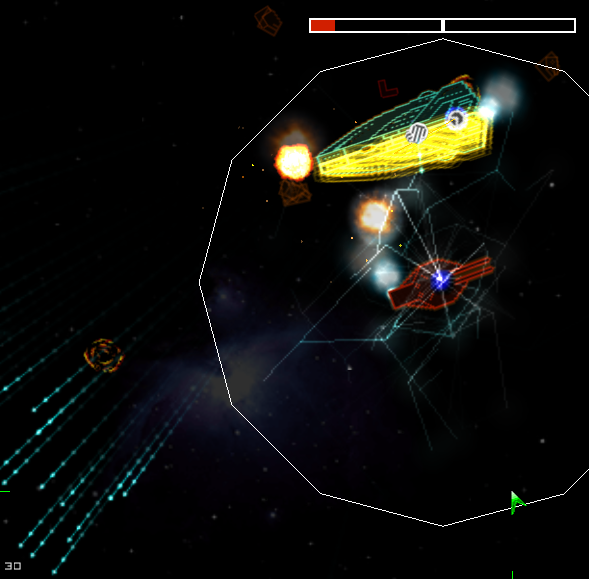
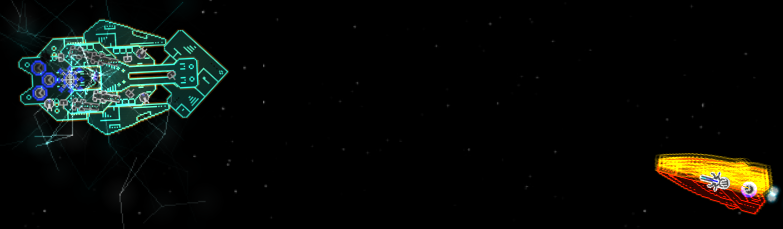
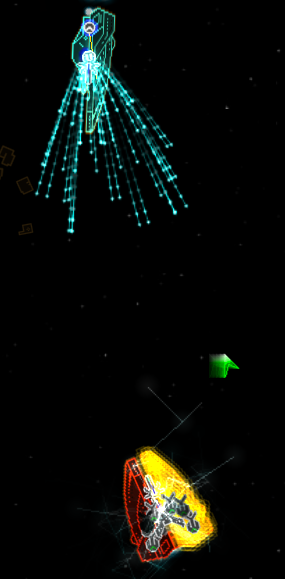
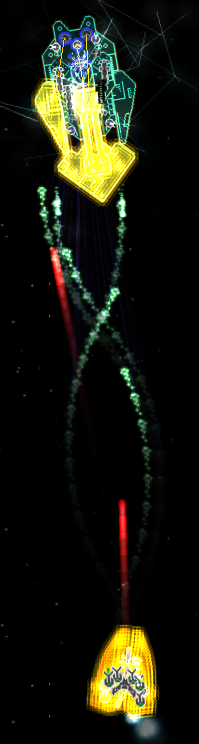
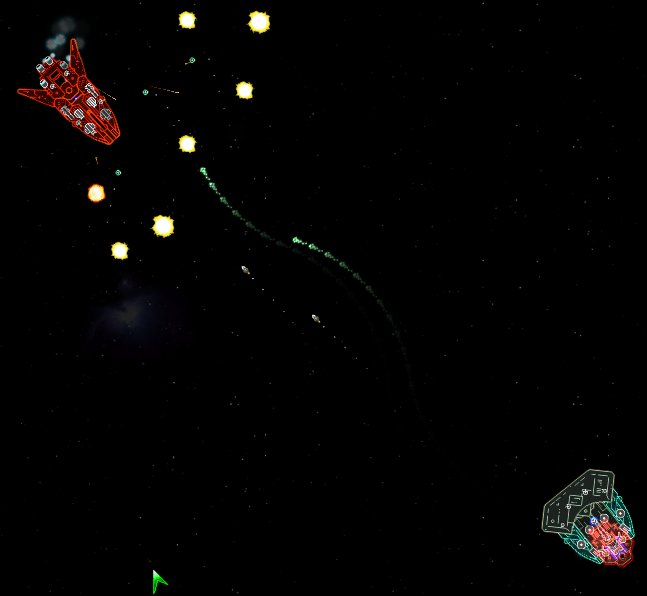
Scorpion vs SCOTLAND:
Round 1:
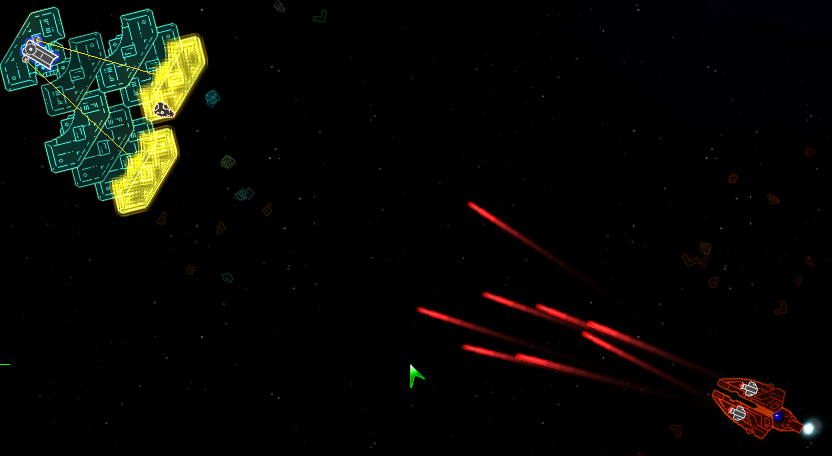
The two flankers danced around each other, the SCOTLAND firing and the Scorpion not so much, the fight baring some minor resemblance to the Cower vs Showerhead fight...
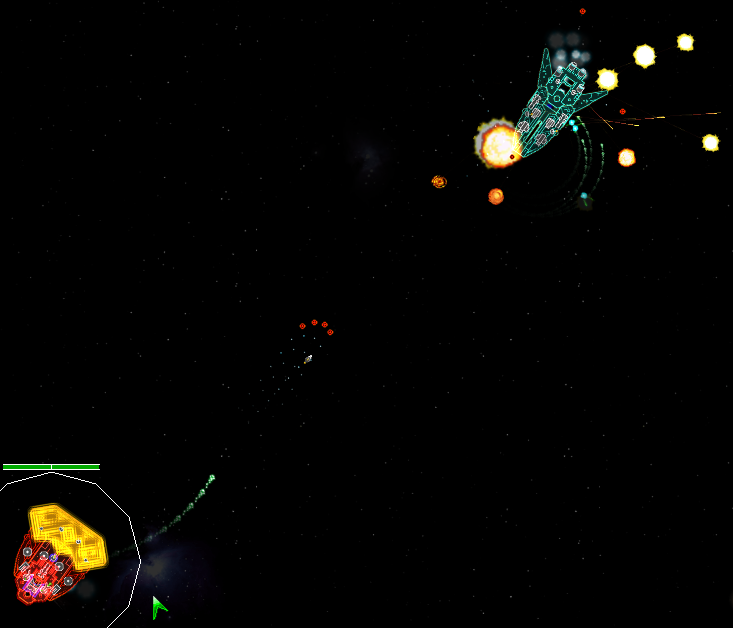
Unlike that fight, however, the SCOTLAND was well able to hit the Scorpion with its missiles, Demeters and weasel guns. It soon claimed one of the Scorpions wing sections...

And started to wear it down in earnest...
After I took that shot, however, the ships lost contact with each other not once, not twice, but three times in a row... Each time, I used a Cracker to move the Scorpion back into the SCOTLAND's range, but the same thing happened again, twice... The fourth time, however, the two ships stayed in contact long enough for the SCOTLAND to destroy two more of the Scorpion's sections...

It was pretty clear at this point that the fight was very much in the SCOTLAND's favor, being able to position itself outside of the Scorpion's range and pound it with its long range artillery weapons, so I called the fight in favor of the SCOTLAND...
Round 2:
I spawned The Scorpion closer to the SCOTLAND in the hopes of giving the former a fair fight. Of course, the SCOTLAND only danced out of the Scorpion's range and proceeded to hammer it with its artillery...
The SCOTLAND eventually destroyed a wing...
...followed by more sections...
...and then lost contact with the Scorpion again... This is one dull fight, and one I rule in favor of the SCOTLAND...
Winner by default: SCOTLAND
Cruiser standings after rounds 4 and 5:
Wins-losses:
Swarm Station: 5-0
Obfuscation III: 4-0
Bullete: 4-3
BAT: 3-2
Phoebus: 2-1
SCOTLAND: 1-4
Carbon: 1-5
Scorpion: 0-5
(Note: If you see an error in the standings, please tell me)
Tomorrow's fights:
Phoebus vs Swarm Station
Obfuscation III vs Phoebus
Phoebus vs Scorpion
Carbon vs SCOTLAND
Obfuscation III vs Scorpion
Obfuscation III vs Swarm Station
Big Armoured Turd vs SCOTLAND
Big Armoured Turd vs Phoebus
Battle results for January 18th:
Bullete vs Carbon:
Round 1:
The Bullete was very, very slow in raising its deflectors (I'm not sure if this was because it set its deflectors to its tiny sections immediately upon seeing the Carbon or just because it didn't raise its deflectors at all for whatever reason), and the Carbon quickly took advantage of this, wasting no time in sniping off the Bullete's Frosch gun...
By the time the Bullete raised both of its deflectors, it was well on the way to losing some of its pulse guns and it looked like the Carbon might just cause a major upset. However, the Bullete fought back, claiming the first section kill...
...and held on, even as its sections nearly collapsed under the Carbon's furious railgun barrages. Eventually, the Bullete was able to send the Carbon into a hull shock,...
...one that proved fatal...
Round 2:
The Bullete was somewhat better with its deflectors this time, managing to preserve its Frosch gun long enough for it to get a shot off...
...which drained the Carbon's deflectors. When the two ships got close, the Bullete was hit by the Carbon's pulse guns, which is what caused it to correctly apply its deflectors (as had happened last round). With a second Frosch gun ship, the Carbon's deflectors failed and the Bullete was quick to take advantage, tearing through the Carbon's armour, sending it into hull shock...
...and destroying it...
Winner: Bullete
Phoebus vs SCOTLAND:
Round 1:
The Phoebus took the early lead. Taking advantage of a poor deflector placement, it quickly blew off the SCOTLAND's bunker section...
The SCOTLAND's deflector did still manage to keep it alive for some time, however, as the Phoebus' super accurate mining beams would always target the SCOTLAND's core, hitting the same section every time. The SCOTLAND is faster than the Phoebus and was quickly able to pull out of the Phoebus' mining beam range each time it jumped in close with its Dieterling device. The Scotland didn't proved nimble enough, however, and its own weapons proved useless against the Phoebus' deflector and impeder combination. The Phoebus was able to lance off the section it had been hitting when the SCOTLAND's deflector failed, sending the SCOTLAND into hull shock...
It wasn't much longer before the Phoebus Dieterlinged in again again and finished off the SCOTLAND's now exposed core...
Round 2:
This time, the SCOTLAND was able to place its deflector on the right section and was almost able to put up a serious fight. The Phoebus was unable to exploit the SCOTLAND's first deflector failure and looked like it might start losing its exterior armour. That was until a truly brilliant volley from the Phoebus cut straight through the SCOTLAND's then heavily damaged forward bunker section and into the railgun damaged section behind it, destroying that section and its child section as well, which, of course, sent the SCOTLAND into hull shock...
...and didn't take much longer to finish the SCOTLAND off for the section time running...
Winner: Phoebus
Big Armoured Turd vs Scorpion:
Round 1:
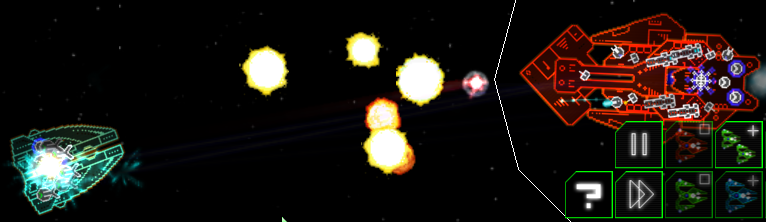
Did the Scorpion stand a chance? I didn't think so... It was quickly surrounded and started taking a heavy pounding...
But it survived the first wave, and thanks to poor deflector placement on the part of T.B.A.T. was actually able to cause some damage...
It was insufficient to save it from T.B.A.T.'s second wave, however...
Round 2:
Poor deflector placement on the part of T.B.A.T. didn't stop the Scorpion from being surrounded...
...and this time, the Scorpion was unable to survive the first wave...
Winner: The Big Armoured Turd
Bullete vs Swarm Station:
Rounds 1:
Just like its fight against the Big Armoured Turd, the Bullete assigned its deflectors to the wrong sections and was taken apart by the relentless swarm of drones, the Bullete's own fire uselessly impacting the Swarm Station's deflector shields...
Round 2:
Interestingly, the Bullete did actually manage to raise one of its deflectors onto to the correct section this time... however, just one proved not to be enough as the other side of the ship was taken apart, just as the Bullete was about the get inside the Swarm Station with its pulse guns...
Winner: Swarm Station
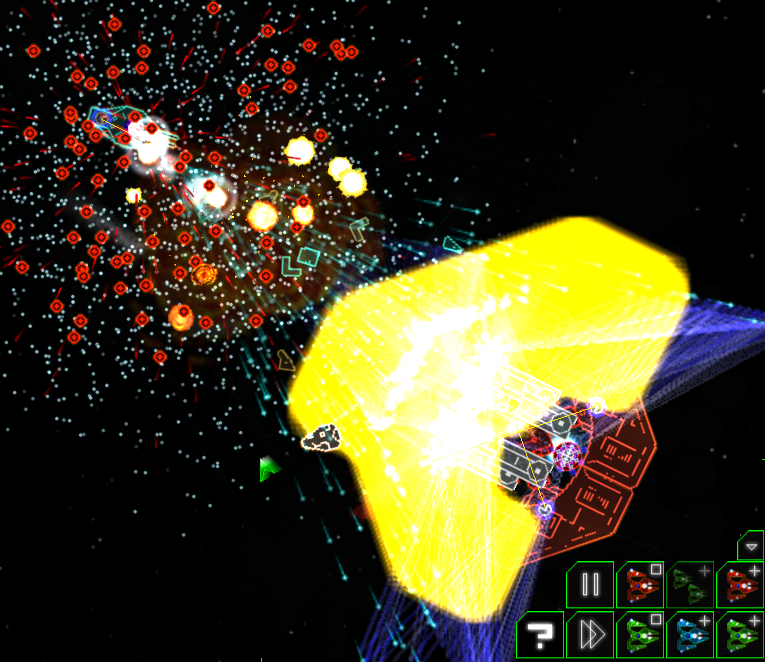
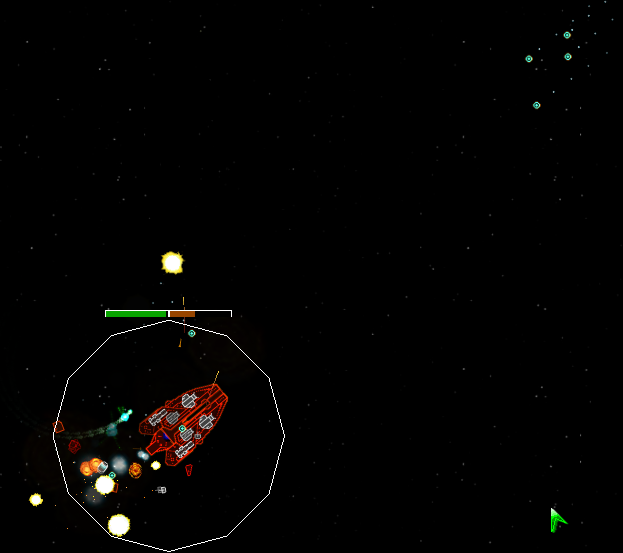
Carbon vs Swarm Station:
Round 1:
The result of this fight was entirely predictable, but the Carbon did do better against the Swarm Station than it had against the Big Armoured Turd. The Carbon got some fairly good deflector placing and its flak guns and impeder were holding the initial sets of drones back somewhat...
Ultimately, though, the Carbon was overwhelmed and lost its deflectors...
Rendering it powerless to survive the second wave, the Swarm Station's deflectors easily repulsing the few railgun shots the Carbon managed to put out...
Round 2:
The Carbon had some great deflector placement and lucky flak gun shots, surviving the Swarm Station's first wave virtually unscathed...
It survived the Station's second wave as well...
But by the third wave, the Carbon was wearing down and lost its deflectors...
To be finished off with the Swarm Station's final wave... Throughout the entire fight the Carbon's railguns were unable to pierce the Swarm Station's deflectors. Even when these failed, the Carbon simply didn't have enough weapons to capitalize on the momentary weakness...
Winner: Swarm Station
Bullete vs Obfuscation III:
Round 1:
These two ships virtually only differ in their weapons compliment and the fact that the Obfuscation has a Dieterling device. The Bullete proved hard for the Obfuscation to hit with its weasel guns, and the Bullete took an early lead, firing its Frosch gun first. This proved extremely effective against a small target like the Obfuscation and its deflectors quickly failed...
The Obfuscation recovered, however, its strong hull able to withstand the Bulette's assault, if not by much. It was even able to return the Bullete's Frosch gun favor...
The fight continued and in the end it was the Obfuscation that claimed the first section kill, able to use its Dieterling device to leap away from the danger of the Bullete's pulse guns momentarily several times, giving it enough time to score some critical weasel gun hits. The stubborn Bullete, however, Frosch gunned the Obfuscation exactly at that moment and closed back in for one last, desperate assault...
It almost worked. Even when its core was completely exposed, the Bullete continued to fight, refusing to give up, but eventually succumbing to the Obfuscation's quad blaster, which lanced the Bullete's pulse guns off one-by-one...
Round 2:
This time, the Obfuscation fired its Frosch gun first. The Bullete failed to raise its deflectors (or else, attached them to the wrong sections again), and almost lost its starboard section by the time it did manage to raise them....
Soon after, the Bullete did lose its starboard section...
It returned fire with its Frosch gun and did manage to cause minor amounts of damage to the Obfuscation, but it was too late. The Bullete's core was quickly exposed and destroyed by the Obfuscation III...
Winner: Obfuscation III
Carbon vs Obfuscation III:
Round 1:
This fight took awhile. The Carbon's flak guns, deflectors and impeder proved a serious hindrance for the Obfuscation III's weasel guns. A Frosch gunning of the Carbon allowed the Obfuscation to get a few good hits in...
But it was short lived. A second Frosch gunning allowed the Obfuscation to destroy the Carbon's nose piece...
But for a while that was it. Meanwhile, the Carbon's railguns, whilst being mostly repulsed by the Obfuscation's deflectors, had managed to cause some damage to the Obfuscation's weasel guns an almost sniped off a deflector. It wasn't enough, however, and eventually the Carbon lost its vital rear section mounting the ship's deflectors...
A short time later, the rest of the ship followed suit...
Round 2:
The fight started much as the last round had, with the Carbon's deflectors quickly discharging thanks to the Obfuscation's weasel guns. Once again, this didn't prove fatal...
Unlike last round, however, the Obfuscation cornered the Carbon...
...and a close ranged brawl ensued. The Carbon's flak guns once again prevented the Obfuscation from using its weasel guns to full effect. Soon, the Obfuscation started to suffer from deflector failure, its systems being sniped off one-by-one by the Carbon's railguns...
The Obfuscation did manage to return the favor, destroying the Carbon's critical rear section. At this point, the Carbon broke out of the corner and withdrew up the right edge of the map. A greatly worn down Obfuscation followed, but its remaining weasel guns proved useless against the withdrawing Carbon and its flak guns, even despite the ship's loss of its deflectors...
The Carbon then finished detoothing the Obfuscation and cored it...
Round 3: Tiebreaker:
The virtual coin toss came up heads, so the Carbon would play as the ally ship and the Obfuscation III would play as the enemy ship...
The Obfuscation had a lucky break early on, taking out the Carbon's bunker strut...
The Carbon retreated into a corner, and another close range brawl ensued. This one didn't last nearly as long as round 2's however. The Carbon soon lost its critical rear section, not having had enough time to snipe off any of the Obfuscation's systems...
It wasn't much longer before the Carbon went into hull shock...
...and was cut to pieces...
Winner: Obfuscation III
Scorpion vs SCOTLAND:
Round 1:
The two flankers danced around each other, the SCOTLAND firing and the Scorpion not so much, the fight baring some minor resemblance to the Cower vs Showerhead fight...
Unlike that fight, however, the SCOTLAND was well able to hit the Scorpion with its missiles, Demeters and weasel guns. It soon claimed one of the Scorpions wing sections...
And started to wear it down in earnest...
After I took that shot, however, the ships lost contact with each other not once, not twice, but three times in a row... Each time, I used a Cracker to move the Scorpion back into the SCOTLAND's range, but the same thing happened again, twice... The fourth time, however, the two ships stayed in contact long enough for the SCOTLAND to destroy two more of the Scorpion's sections...
It was pretty clear at this point that the fight was very much in the SCOTLAND's favor, being able to position itself outside of the Scorpion's range and pound it with its long range artillery weapons, so I called the fight in favor of the SCOTLAND...
Round 2:
I spawned The Scorpion closer to the SCOTLAND in the hopes of giving the former a fair fight. Of course, the SCOTLAND only danced out of the Scorpion's range and proceeded to hammer it with its artillery...
The SCOTLAND eventually destroyed a wing...
...followed by more sections...
...and then lost contact with the Scorpion again... This is one dull fight, and one I rule in favor of the SCOTLAND...
Winner by default: SCOTLAND
Cruiser standings after rounds 4 and 5:
Wins-losses:
Swarm Station: 5-0
Obfuscation III: 4-0
Bullete: 4-3
BAT: 3-2
Phoebus: 2-1
SCOTLAND: 1-4
Carbon: 1-5
Scorpion: 0-5
(Note: If you see an error in the standings, please tell me)
Tomorrow's fights:
Phoebus vs Swarm Station
Obfuscation III vs Phoebus
Phoebus vs Scorpion
Carbon vs SCOTLAND
Obfuscation III vs Scorpion
Obfuscation III vs Swarm Station
Big Armoured Turd vs SCOTLAND
Big Armoured Turd vs Phoebus
Last edited by Captain Trek on Sun Feb 03, 2008 7:30 pm, edited 1 time in total.
[img]http://i210.photobucket.com/albums/bb6/CaptainTrek/Federationsignature.jpg[/img]

lol - I just told him about this in another thread, so he now knows about this feature of the sandbox and has started using it.Ethril wrote:Again, I don't see why you won't just turn on the Fleet AI Controller and bump up the maximum AI range in the Misc. Options.
This would stop the problem with ships losing contact with eachother.
Strange, the Carbon performed near flawlessly against the Obfustication back when I'd done test runs after building my ship. (Three deflectors covering the front and sides, along with the impeder making it near immune to Weasels.)
I guess that mainly leaves the Phoebus and its huge stretched side sections to worry about.
I guess that mainly leaves the Phoebus and its huge stretched side sections to worry about.