These sections can all be created using very simple raster art apps.
Step 1

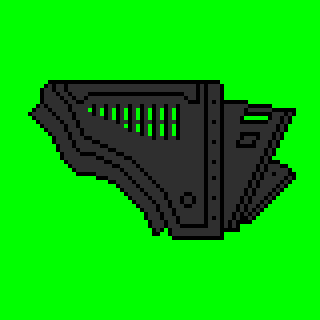
Assuming that you are converting an old style sprite, substitute background colour for a neutral one (I've used 0,255,0 here) and the white outlining with black. The 473 fill can stay for now.
Step 2

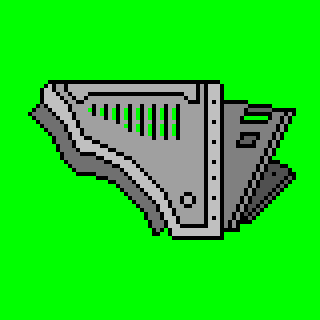
Now fill each enclosed area of the section with a base shade of grey. Areas which appear higher should be a lighter shade than areas which appear lower - this is the same principle as used in shipbuilding.
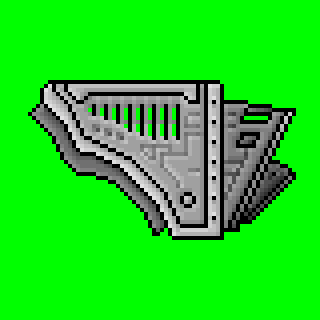
Step 3


Now to add depth to the section we need to emphasize the edges. An edge can be defined as any black or background colour pixel. In effect we are trying to simulate a single light source landing on the section.
To do this chose two adjacent sides, these two sides will receive highlighting while the remaining two will be shadowed (made darker). So for example for this section I have made all pixels directly to the right or below an edge pixel lighter, and any pixel directly to the left or above an edge pixel darker.
In general any pixel bordered on 2 sides by an edge pixel will receive a strong highlight (if it is to the right of an edge pixel) or a strong shadow (if it is left of an edge). Pixels bordered only on one side will receive the weaker highlight or shadow. In addition use the weak shade to soften the edge between any strong shade pixels and the base colour.
If unsure which edge rule to apply use your discretion.
Step 4

If any large flat areas of base colour remain add detail. Lines can simulate grooves in the sections surface, highlight these as detailed in step 4.
Step 5


Fool about with the contrast until you are happy with the final look.
A Note on Colour.
There has been some discussion around whether we should try and standardise the colours used in inverted sections to ensure consistency between packs. For instance if I'd known what I was doing I could have picked the colours beforehand and not needed Step 5 at all.
After the Uraki pack (which won't follow any rules) I will at least attempt to standardise my own subsequent sections in the following way:
Base colour a multiple of 16, or more likely 32.
Strong highlight = Base colour + 46
Weak highlight = Base colour + 23
Strong shadow = Base colour - 46
Weak shadow = Base colour - 23
Why multiples of 23? Because in the Step 5 section the contrast shift ended up like this. This is obviously arbitrary, provisional and subject to change.
If there are any questions/comments fire at will.
Kae_mecha01 used with kind permission.
TSA
KAE EDIT: Added magnified versions for convenience, hope you don't mind.